Saturday, November 14, 2009

Fun with Date Arithmetic

We all know that the date command tells you the current time. Occasionally, you use the same command to set the time. That however becomes rarer these days with the advent of the ntp service that automatically synchronizes your computer's time with a super accurate public time server of your choice.

Various implementations of the date command are in use today. This article discusses the date command of the GNU coreutils package.

By default, the date command tells you the time now. The date command also lets you do some basic date addition and subtraction. This is achieved by specifying the -d option which displays a time that you entered as a parameter rather than now.

How many times have you asked yourself what the calendar date is N days ago? Just the other day, I needed to find out the precise date of 30 days ago in order to locate the proper log file.

$ date
Sat Nov 14 17:54:51 PST 2009
$ date -d -30days
Thu Oct 15 18:54:56 PDT 2009


Just like you use subtraction to calculate a back date, you use addition to calculate a forward date. The example below displays the date 30 days from today.
$ date -d +30days
Thu Oct 15 18:54:56 PDT 2009


Besides days as the unit, you can also manipulate years, months, hours, minutes, and seconds.
peter@tiger:~$ date -d +2months
Thu Jan 14 18:48:43 PST 2010


You can combine them together like this:
$ date -d +2months17days
Sun Jan 31 18:49:45 PST 2010


Note that all the above are calculated relative to today's date. What about queries like 10 days tomorrow?
$ date -d tomorrow+10days
date -d tomorrow+10days
Wed Nov 25 18:52:03 PST 2009


10 days yesterday?
$ date -d yesterday-10days
Tue Nov 3 18:53:07 PST 2009


You can also perform your arithmetic relative to a specific day, say January 21, 2010.
$ date -d '2010-01-21 + 2 weeks 3 days'
Sun Feb 7 00:00:00 PST 2010


Lastly, the date command also recognizes the day of weeks (Sunday, Monday, ...) and the 2 keywords "last" and "next".
$ date -d 'next tuesday + 1 day'
Wed Nov 18 00:00:00 PST 2009


I hope you have fun with this versatile tool.

Friday, July 17, 2009

How to move print jobs from one printer queue to another

In the olden days, an entire office department shared one printer. At home, an entire household shared one printer. Nowadays, I have 2 printers at home (1 HP LaserJet and 1 Samsung Monochrome Laser printer).

With access to multiple printers come new opportunities and challenges. One of those opportunities is that if one printer goes down for whatever reason, you can route your print jobs to the surviving one. One challenge is that you need to manage multiple printer queues. With more than 1 printer, I often find myself printing to the wrong one. How do you route print jobs from 1 printer to another when the need arises?

Job Submitted to Wrong Printer


Let's first consider this situation: you just submit your print job to the default printer(mySamsung), but you realize after the fact that it is the wrong printer.

First, you should find out the print job number. Run the familiar lpq command.
$ lpq -P mySamsung
mySamsung is ready and printing
Rank Owner Job File(s) Total Size
active peter 706 (i) 100352 bytes
1st peter 707 MoviesReview 228352 bytes
$

Note that given mySamsung is my default printer, I don't really need to explicitly specify the printer: lpq without any argument will do just fine.

Say job 707 is the one you want to move to the other printer.

The Linux command to do the actual migration is lpmove. Note that you need to run the command as root.

$ sudo lpmove mySamsung-707 myHP
$ lpq -P myHP
myHP is ready
Rank Owner Job File(s) Total Size
active peter 707 MoviesReview 228352 bytes

Note how I specified the job number to lpmove. The format is the printer name(mySamsung) and a dash(-), followed by the job number (707).


Printer Down


Suppose mySamsung is out of service for whatever reason. Then, you need to move all print jobs from mySamsung to myPrinter.

$ sudo lpmove mySamsung myHP
$

Thursday, July 2, 2009

Search and replace line feeds using emacs

As an avid emacs user for a decade plus, I am a little embarrassed to confess that I did not know for the longest time how to search for or replace line feed (newline) characters.

If you are only searching for run-of-the-mill ASCII strings such as abc, you just type C-s (control-S), and then the characters, and hit return.

Unfortunately, if your search string includes a line feed character, e.g., abc followed by a newline, I have some good news and some bad news for you.

The good news is that you use the same shortcut (C-s) just like you would normally to search for anything else.

The bad news is that the representation of what emacs understands to be a newline is not that intuitive ... even to geeks. Instead of something like \n which may mean something to developers, you need to enter C-q C-j (Control-Q, Control-J) for each line feed in the search string.

C-q is the shortcut for the quoted-insert command. The character you type immediately after C-q is escaped, i.e., its normal function is suppressed. C-j is the line feed character. Why the letter j, you ask? It turns out that the line feed character is represented by the decimal value 10 in the ASCII table, and j is the 10th letter in the English alphabet. Similarly, if you are searching for the Tab instead of the newline character, use C-q C-i to denote the Tab character.

If you want to replace occurrences of a string that includes one or more line feeds, the method is similar. Use the usual command replace-string or query-replace(M-%). Enter C-q C-j where you would expect to type the new line.
M-x replace-string (Hit return) abcC-qC-j (Hit return) def (Hit return)

Sunday, June 7, 2009

loook: A light-weight text search tool for OpenOffice documents

If you are happily running a desktop search tool such as Tracker or Beagle, read no further. You already have the search tool you need to search OpenOffice files and more. These desktop search tools build indexes to improve search performance, and are in general quite scalable. Yet, a desktop search tool may be an overkill if you are just searching for certain text string in a directory containing OpenOffice files.

loook is a no-frill, yet very functional text search tool for OpenOffice files. Unlike the aforementioned desktop search engines, it does not build an index of your OpenOffice files. Despite the lack of an index, searching a hierarchy of 75 OpenOffice documents only took a couple of seconds. That is good enough for my use.

loook composes of a single zipped-up python script which you can freely download and install. Unzip the downloaded file into a directory of your choice. On my Debian Etch system, I did not have to install any additional packages for loook to run.

Running the tool cannot be any simpler. Open a bash shell, and enter:
$ python somedir/loook.py 


The Viewer field has the default value: soffice. This is the name of the OpenOffice executable. You don't need to change this field unless your version of OpenOffice has a different name or the executable is not in your default PATH.

What you do want to change are the following fields:

  • Search Path
  • Search Terms
  • Mode


Search Path

You navigate or type in the path of the directory containing the OpenOffice files you want to search. loook will recursively search the hierarchy starting from the specified directory. Unfortunately, you are limited to specifying one starting directory only.

Search Terms

You enter your search terms in this field. Note that loook supports Unicode. Non-English language users can search using UTF-8 characters.

Mode

The Mode determines whether a match requires all the search terms to be present in a document (AND search), any of the terms to be present (OR search), or the terms must appear together (PHRASE search).

You can pre-populate the search path and the search terms. Simply enter them as arguments to loook on the command line. For example,

$ python somedir/loook.py /home/peter/mydocs "Cisco Routers"


The search results are returned in the Matches field. Note that only the full path of the files are returned. It does not display the actual matches. You can double click the file path in the Matches field to directly open the file with OpenOffice.

loook does not have all the bells and whistles that you expect of a desktop search tool, with respect to both features and supported file formats. However, if all you want is a light-weight tool for searching OpenOffice documents in a directory structure, it is worth your time to try it out.

Monday, May 18, 2009

Is PHP supported on my Web Server?

Recently, I had to install a PHP-based web application on my Apache web server.

My first question was: "Is PHP enabled on the web server?"

You can always ask the systems guy. But if you happen to be the systems guy, and you don't quite remember if you have installed PHP, here is how to find out.

  1. Create a new file with a php suffix (say myphp.php)
  2. Copy and paste the following code into the php file.
    (I cannot get blogger.com to display PHP code; use the code in the April 29, 2009 comment)
  3. Save the file and upload it to a location on your web server that is accessible to the World Wide Web.
    For expedience, upload it to the Apache document root directory which is /var/www on my Debian Etch server.
  4. Open your web browser to the URL for that PHP file (http://localhost/myphp.php).


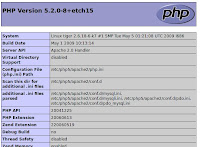
If your web server supports PHP, the browser will return with a page full of information about the PHP version and configuration. In addition, it will display information about your web server and your system in general.

On the contrary, if all you see is a blank page, then you know PHP is not supported.

Note that you must delete the myphp.php file from your web server after you obtain the necessary info. You don't want people to run the PHP script, and obtain sensitive information about your system.

Saturday, May 16, 2009

More on Inserting Arguments from Previous Commands

I previously blogged on using the shortcut Alt + dot to insert the last argument from the previous command.

Suppose you don't want the last argument. Instead, you want to insert the first, second, or third argument of a previous command.

No problem!

Alt + 1 + dot inserts the first argument of the last command. To key it in properly, hold the alt key, press the 1 key, and then the dot (".") key.

Similarly, alt + 2 + dot inserts the second command argument.

For example, you just executed this command.
$ ls -l /home/peter/somefile.txt   secondfile.txt
-rw-r--r-- 1 peter peter 8115 2007-12-19 21:03 somefile.txt
$

If you now type in cat and then alt + 2 + dot, it will insert the second argument from the last command (-l is the first).
$ cat /home/peter/somefile.txt 


You can repeat the key sequence, and this will go back 1 command at a time, and insert the specified argument of that command.

If you want just the command itself, not an argument, type in alt + 0 + dot .


P.S. Related articles from this blog:

Friday, May 8, 2009

Open a file from the command line using its default application

Windows users are familiar with the concept of file association. When you double click a file (say, cisco.doc), Windows examines the file name extension (doc), and opens the file using the default program associated with that extension(Office).

Linux users can open files in a similar way in their X Window graphical user interface. But, if you want to open the file from the command-line, you need to type out at least the program name, oowriter, or do you?
$ oowriter cisco.doc 


If GNOME is your window manager, use the gnome-open command as follow:
$ gnome-open cisco.doc 


oowriter is automatically started up to open cisco.doc, if oowriter is indeed associated with the .doc file name extension.

For KDE users, use kde-open instead.

Alternatively, you can run the window-manager-neutral program called xdg-open. xdg-open is part of the xdg-utils package.

$ xdg-open cisco.doc

Tuesday, May 5, 2009

Find all (non-)empty files in a directory

Creating an empty file in Linux is easy. If a-file does not exist, create the file and make it empty by simply:
$ touch a-file
$ ls -l a-file
-rw-r--r-- 1 peter peter 0 2009-05-02 20:15 a-file

Finding all empty files in a directory can also be done using a single command. Ditto for non-empty files.

Suppose you want to find all empty files in the directory /home/peter. The command is:
 $ find -L /home/peter -maxdepth 1  -type f -size 0

By default, the find command excludes symbolic files. Use the -L option to include them.

The expression -maxdepth 1 specifies that the maximum depth to which the search will drill is one only. By default, the find command will recursively go down the directory. A maximum depth of 1 means that you only want the files directly under /home/peter. Keep in mind that depth 0 is the level of the command line argument (/home/peter). You can use -maxdepth and -mindepth to finely control the depth levels you want included.

-type f means include regular files only. This is not strictly necessary for empty files (as opposed to non-empty ones) because all directories, even those with no files, are of non-empty size.

-size 0 is self-explanatory.

To find all non-empty files in the same directory, simply add ! before -size 0:
 $ find -L /home/peter -maxdepth 1  -type f ! -size 0

Note that -type f becomes necessary. Without this expression, subdirectories in /home/peter such as /home/peter/.Trash will appear in the output.

Most of the time, you don't just want to find the files: you want to do something with them. Suppose you want to remove all empty files in the directory. For safety, first run the find command by itself to list the files. Then with the xargs command as below.
 $ find -L /home/peter -maxdepth 1  -type f  -size 0 
/home/peter/file1.txt
/home/peter/file2.txt
$ find -L /home/peter -maxdepth 1 -type f -size 0 -print0 |xargs -0 -r rm -f

For more information about how to use the find and xargs commands, see my earlier blog entry.

Saturday, May 2, 2009

A surefire shortcut to Insert the Last Argument of the Last Command

Sometimes, in the Linux command-line world, a seemingly trivial technique can turn out to be tremendously useful. Before I discover the Alt-dot(.) shortcut, I type !$ to insert the last argument of the previous command.

peter@tiger:~$ ls -l Windows_20081110102654.log
-rw-r--r-- 1 peter peter 808 2008-11-10 10:26 Windows_20081110102654.log
peter@tiger:~$ cat !$
cat Windows_20081110102654.log
.....
.....
peter@tiger:~$

Then, I discovered that typing Alt-dot achieves the same result. That is, press (and hold) the Alt key, then the dot key.

There are some advantages of using Alt-dot over !$. First, you can actually see the argument immediately and interactively. You can verify that is indeed what you want, edit it if necessary, before you continue the command-line input, and eventually hit Enter to execute the command. With !$, you better have a pretty good memory.

Another advantage is that you can repeatedly type Alt-dot. The net effect is that you scroll back in command history, and display the last argument of each successive command.

After assimilating the shortcut into my command-line work habit, I found that I have been using it a lot. Give it a try!

PS Related entries from this blog: